How to Remove White Background from Image?
A Lead-in
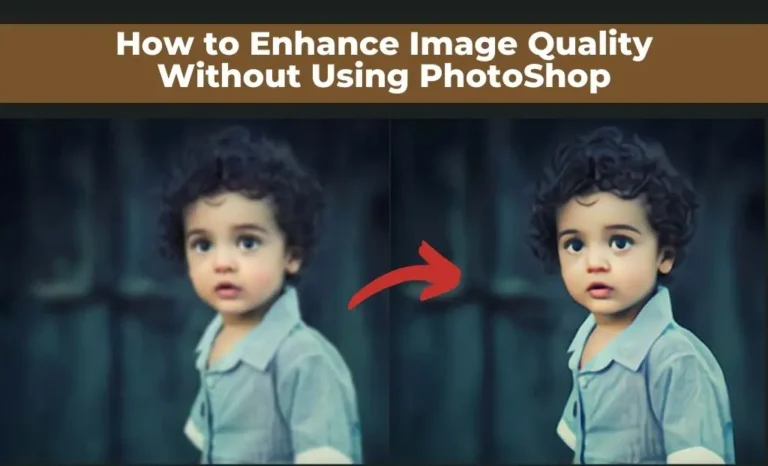
In today’s digital world, images are everywhere—from social media posts and online stores to school projects and professional presentations. A clean image with a transparent background often looks more polished and versatile than one with a plain white backdrop. That’s why learning how to remove white background from image files has become such a valuable skill.
White backgrounds are common because many cameras, scanners, and design tools default to them. However, when you want to place an image on a website, combine it with another design, or create marketing materials, that white space can feel limiting. Removing it allows your subject to blend seamlessly into any background.
In this article, we’ll explore the most practical ways to handle white background removal. We’ll discuss common challenges, step-by-step methods using different tools, and helpful tips to get cleaner, more professional-looking results. Whether you’re a beginner or someone with basic editing experience, this guide will help you confidently make white background transparent using the right approach for your needs.
1. Common Challenges in White Background Removal
Before diving into tools and methods, it’s important to understand why white background removal can sometimes be tricky. At first glance, it might seem simple—just erase the white area. In reality, several challenges can affect the final quality.
Similar Colors
One of the biggest problems occurs when the subject itself contains white or light-colored areas. For example, a white shirt, highlights in hair, or light reflections can easily blend into the background. Removing the background without damaging these details requires precision.
Soft Edges and Shadows
Hair, fur, smoke, and transparent objects often have soft or semi-transparent edges. A rough removal can leave jagged outlines or unnatural cut marks. Shadows can also be mistakenly removed or partially left behind, making the image look odd.
Image Quality
Low-resolution or blurry images are harder to work with. The edges between the subject and the white background may not be clearly defined, which complicates the selection process.
Time and Skill Level
Some tools require manual work and editing skills. Beginners may feel overwhelmed by complex software, while professionals may find manual methods too time-consuming for bulk edits.
Because of these challenges, choosing the right white background remover is crucial. Let’s explore some effective solutions.
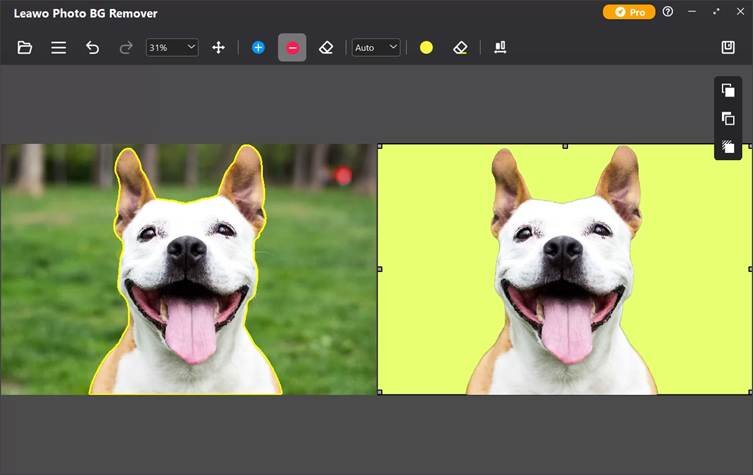
2. How to Remove White Background from Image with Leawo Photo BG Remover?
If you’re looking for an efficient and beginner-friendly way to remove white backgrounds, Leawo Photo BG Remover is a strong option. It is a dedicated module within Leawo PhotoIns, designed to automatically detect subjects and separate them from the background with minimal effort.
Why Choose Leawo Photo BG Remover?
Leawo Photo BG Remover stands out because it uses intelligent algorithms to identify the main subject in an image. This means you don’t need advanced editing skills to get clean results. It’s especially useful for product photos, portraits, and everyday images.
Step-by-Step Guide
- Install and Launch Leawo PhotoIns
Download and install Leawo PhotoIns on your computer. Once installed, open the program and select the Photo BG Remover module. - Import Your Image
Upload the image you want to edit. The software supports common image formats, making it easy to work with most photos. - Automatic Background Detection
As soon as the image is loaded, the tool automatically analyzes it and removes the white background. In many cases, the result is ready within seconds. - Refine the Edges
If necessary, you can fine-tune the result using simple brush tools. Mark areas to keep or remove, ensuring that details like hair or edges remain natural. - Export the Image
Save the final image with a transparent background or place it over a new background of your choice.
Best Use Cases
Leawo Photo BG Remover is ideal if you want to quickly remove the white background from a picture without dealing with complicated layers or selections. It’s also great for users who need consistent results across multiple images.
3. How to Remove White Background in PhotoShop?
Adobe Photoshop is one of the most powerful image editing tools available. If you’re interested in learning how to remove white background in Photoshop, be prepared for a more hands-on approach—but also more control.
Method 1: Using the Magic Wand Tool
- Open your image in Photoshop.
- Select the Magic Wand Tool from the toolbar.
- Click on the white background to select it.
- Adjust the tolerance if needed to include all white areas.
- Press Delete to remove the background.
This method works best for images with a solid white background and clear edges.
Method 2: Using Select Subject and Mask
- Go to “Select” > “Subject.” Photoshop will automatically detect the main object.
- Click “Select and Mask” to refine the selection.
- Use edge refinement tools for hair and soft areas.
- Output the selection as a layer mask.
Advantages and Limitations
Photoshop offers unmatched precision, making it perfect for complex images. However, it has a steeper learning curve and requires a paid subscription. For beginners or quick tasks, it may feel overwhelming compared to automated tools.
4. How to Remove White Background in PowerPoint?
Surprisingly, Microsoft PowerPoint includes a basic background removal feature that can be quite useful. If you’re working on presentations or school projects, this method is convenient.
Steps to Remove Background in PowerPoint
- Insert your image into a slide.
- Select the image and go to the “Picture Format” tab.
- Click “Remove Background.”
- PowerPoint will highlight the background in purple.
- Use “Mark Areas to Keep” or “Mark Areas to Remove” to refine the result.
- Apply the changes.
When to Use PowerPoint
PowerPoint is suitable for simple images with clear contrast between the subject and the white background. While it’s not as advanced as dedicated photo editors, it’s handy when you don’t have access to other tools.
5. Tips for Cleaner Results After Removing White Background
No matter which tool you use, following a few best practices can significantly improve your results.
Use High-Quality Images
Start with the highest resolution image possible. Clear edges make background removal easier and more accurate.
Zoom In and Inspect Edges
After removal, zoom in to check for leftover white halos or jagged edges. Small adjustments can make a big difference.
Add a Slight Feather
Softening the edges slightly can help the subject blend naturally into a new background.
Match the New Background
When placing the subject onto a new background, consider lighting and color tone. This helps avoid a “cut-out” look.
Choose the Right Tool
If you need speed and simplicity, an automated solution like Leawo Photo BG Remover is ideal. For detailed professional work, Photoshop may be worth the effort.
6. Conclusion
Learning how to remove white background from image files opens up endless creative possibilities. Whether you’re designing a presentation, editing product photos, or creating content for social media, removing the white background allows your images to look cleaner and more professional.
Each method has its strengths. Automated tools like Leawo Photo BG Remover, part of Leawo PhotoIns, are perfect for quick and accurate results with minimal effort. Photoshop offers advanced control for those willing to invest time in learning. Even PowerPoint provides a simple solution for basic needs.
Ultimately, the best approach depends on your skill level, project requirements, and the complexity of the image. By understanding the challenges and applying the right techniques, you can confidently make white background transparent and elevate the visual impact of your images.
Read more: Feature Mechanics that Define NoLimit City Slots
SEO Company India Leading Experts in Digital Marketing Solutions
How LOLER and LOTOTO Controls Reduce Workplace Accidents and Injuries